Options for serializing an Array or List when using Serializable?

Lets say you have to implement Xml Serialization on your objects. Many of your exiting Xml files have Lists. However, what if you are working with existing Xml files and you don’t get to reformat them? So you have to make the List in your object react the way it already looks in possible poorly designed Xml Files.

Ok, so off the top of my head, I can think of many ways that a List of objects could be displayed in XML (and there are probably more). For simplicity’s sake, I am going to use String objects for this, but this goes along with any object.

So how does Xml Serialization hold up when confronted with existing Xml files and existing lists?

Well, lets first show you some example Lists in Xml and then lets see what types are supported.

Type 1 – Grouped Lists

Status: Supported – This is the default way Xml Serialization stores lists in Xml files.
Xml Design: Excellent.

The object elements are contained in a parent element. As shown, each String element is inside the Strings (notice it is plural) element.

<rootElement>
  <strings>
    <string>Some string 0.</string>
    <string>Some string 1.</string>
    <string>Some string 2.</string>
    <string>Some string 3.</string>
    <string>Some string 4.</string>
  </strings>
</rootElement>

Type 2 – Grouped Lists numbered

Status: Unknown – I haven’t found a way to do this yet, but I am not ready to say it can’t be done.  If it can’t be done, I think it “should be” supported.
Xml Design: Average. I am not sure if you can serialize this. Someone designing an Xml without serialization in mind would not think this design is wrong.

Same as above only each element is numbered incrementally from 0. (Or it could start at 1, right?)

<rootElement>
  <strings>
    <string0>Some string 0.</string0>
    <string1>Some string 1.</string1>
    <string2>Some string 2.</string2>
    <string3>Some string 3.</string3>
    <string4>Some string 4.</string4>
  </strings>
</rootElement>

Type 3 – Flat List

Status: Supported – If you add [XmlElement] above the property, then this is the format you get.
Xml Design: Excellent. This is a standard supported format.

There is just a list, with no parent attribute containing the list items.

<rootElement>
    <string>Some string 0.</string>
    <string>Some string 1.</string>
    <string>Some string 2.</string>
    <string>Some string 3.</string>
    <string>Some string 4.</string>
</rootElement>

Type 4 – Flat List numbered

Status: Unknown – I haven’t found a way to do this yet, but I am not ready to say it can’t be done. If it can’t be done, I think it “should be” supported.
Xml Design: Average. I am not sure if you can serialize this. Someone designing an Xml without serialization in mind would not think this design is wrong.

Same as the Flat list above only each element is numbered incrementally from 0. (Or it could start at 1, right?)

<rootElement>
    <string0>Some string 0.</string0>
    <string1>Some string 1.</string1>
    <string2>Some string 2.</string2>
    <string3>Some string 3.</string3>
    <string4>Some string 4.</string4>
</rootElement>

Type 5 – Attribute Lists

Status: Broken but working – If you put [XmlAttribute] before and Array or List, beware. It seems it uses space as the delimiter. I can’t seem to find a way to change the delimiter.
Xml Design: Poor. You can serialize this, but it deserialize the same way as it serializes.

A single attribute that contains a list. Obviously the object can’t be complex to match this type.  String works, but a complex object has to be an element not an attribute.

I can already see that this method would be tough to use. Right away I am wondering seeing the problem of using white space as a delimiter. However, quotes are important too. Xml Serialization automatically replaces quotes with the following string:

"

I would have thought since it uses a space as a delimiter that it would have replaced white space with some similar character entity string, but it did not.

<rootElement Strings="Some string 0. Some string 1. Some string 2. Some string 3. Some string 4.">
</rootElement>

Type 6 – Attribute Lists numbered

Status: Unknown – This is what I expected when I used the [XmlAttribute] tag but instead I got Type 5.  I have seen this in Xml files, so supporting it would be nice.
Xml Design: Average.  If a List exists that is always expected to have only one to five elements, I see nothing wrong with this design.

A separate, numbered attribute for each element in the list.

<rootElement String0=Some string 0." String1="Some string 1." String2="Some string 2." String3="Some string 3." String4="Some string 4."
</rootElement>

Type 7 – Delimited text in an element

Status: No supported – This just is not how it is designed to work, nor should it every work this way.
Xml Design: Poor – This defeats the whole purpose of an Xml.

This assumes that the list is inside a single element and has some kind of delimiter. Below the delimiter is a new line character. (Let’s assume that we expect white space at the front and end of the string to be trimmed and blank lines to be ignored.)

<rootElement>
  <strings>
    Some string 0.
    Some string 1.
    Some string 2.
    Some string 3.
    Some string 4.
  <strings>
</rootElement>

Conclusion

Type 1 and Type 2 are the ideal methods and work perfectly for me.

Types 2, 4, 6 should be supported if they aren’t already.  Maybe there is a way to do these that I don’t know about.

Type 5 seems to work but doesn’t and it is really disappointing that the [XmlAttribute] tag works this way instead of like Type 6.

Type 7 is bad and you pretty much are left to fixing this with manual code and not using Xml Serialization.


Copyright ® Rhyous.com – Linking to this page is allowed without permission and as many as ten lines of this page can be used along with this link. Any other use of this page is allowed only by permission of Rhyous.com.

How to create a custom class template for Xml Serializable classes?

Ok, so you don’t always want a default class template for every type of class.  I have to create a bunch of classes that implement Serializable and if the class template assumed this, that would be great.  However, I don’t want my default class template to assume this.

So here is what I did broken down into four simple steps.

  1. Open or create a c# project.
  2. Create a class file.
  3. Add the text and the variables to replaced.
  4. Export the item as a template.

Step 1 – Open or create a c# project.

Ok, so any project will do.  I used an existing project, but you can create a new one if you want.  Any C# project should allow this to happen.

Step 2 – Create a class file.

In one of my C# projects in Visual Studio, I created a new class called XmlClass.cs.

Step 3 – Add the text and the variables to replaced

I put the following text into my new class:

using System;
using System.Collections.Generic;
using System.Xml.Serialization;

namespace $rootnamespace$
{
	[Serializable]
	public class $safeitemrootname$
	{
		#region Member Variables
		#endregion

		#region Constructors

		/*
		 * The default constructor
 		 */
		public $safeitemrootname$()
		{
		}

		#endregion

		#region Properties
		#endregion

		#region Functions
		#endregion

		#region Enums
		#endregion
	}
}

Step 4 – Export the item as a template

  1. In Visual Studio, chose File | Export Template.  This starts a wizard that is extremely easy to follow.Note: If you have unsaved files in your project, you will be prompted to save them.
  2. Chose Item template, select your project, and click Next.
  3. In the next screen there was a tree view of check boxes for all my objects.  I checked the box next to my XmlClass.cs.
  4. In the next screen, provide references.Note: I added only System and System.Xml.
  5. In the next screen, provide a Template name and a Template description.
  6. Click finish.

You should now have the option under My Templates when you add a new item to your project.

This class will be  useful and will save you and your team some typing when you are in the class creation phase of your project and you are creating all your Serializable classes.


Copyright ® Rhyous.com – Linking to this page is allowed without permission and as many as ten lines of this page can be used along with this link. Any other use of this page is allowed only by permission of Rhyous.com.

Changing the prop snippet for creating a Property in C#

Ok, so it is very common for the c# member variables to start with either an _ (underscore) or an m.  So when creating a property, you can save a lot of time by changing it to assume this as well.

For example, your class may look as follows:

namespace AgentConfigurationPlugin
{
    public class Class1
    {
        #region Member Variables
        String _MemberString;
        int _MemberInt;
        #endregion

        #region Constructors

        /*
		 * The default constructor
 		 */
        public Class1()
        {
        }

        #endregion

        #region Properties
        public String MemberString
        {
            get { return _MemberString; }
            set { _MemberString = value; }
        }

        public int Memberint
        {
            get { return _MemberInt; }
            set { _MemberInt = value; }
        }
        #endregion
    }
}

Note: I hate the _ character as it is hard to type (being up to the right of my pinky finger), so I use the letter “m”, which is easy to type (being just below my pointer finger) and it also stands for “member variable”.

        #region Member Variables
        String mMemberString;
        int mMemberInt;
        #endregion

Anyway, whether it is an “m” or “_” or any other character, it is common to prefix member variables. So it would be useful if the property snippet assumed that prefix character as well.

The default snippet for creating a Property is located here:

C:\Program Files (x86)\Microsoft Visual Studio 9.0\VC#\Snippets\1033\Visual C#\prop.snippet

The contents looks as follows.

<?xml version="1.0" encoding="utf-8" ?>
<codeSnippets  xmlns="http://schemas.microsoft.com/VisualStudio/2005/CodeSnippet">
	<codeSnippet Format="1.0.0">
		<header>
			<title>prop</title>
			<shortcut>prop</shortcut>
			<description>Code snippet for an automatically implemented property</description>
			<author>Microsoft Corporation</author>
			<snippetTypes>
				<snippetType>Expansion</snippetType>
			</snippetTypes>
		</header>
		<snippet>
			<declarations>
				<literal>
					<id>type</id>
					<toolTip>Property type</toolTip>
					<default>int</default>
				</literal>
				<literal>
					<id>property</id>
					<toolTip>Property name</toolTip>
					<default>MyProperty</default>
				</literal>
			</declarations>
			<code Language="csharp"><!&#91;CDATA&#91;public $type$ $property$ { get; set; }$end$&#93;&#93;>
			</code>
		</snippet>
	</codeSnippet>
</codeSnippets>

Change it to be like this:

<?xml version="1.0" encoding="utf-8" ?>
<codeSnippets  xmlns="http://schemas.microsoft.com/VisualStudio/2005/CodeSnippet">
	<codeSnippet Format="1.0.0">
		<header>
			<title>prop</title>
			<shortcut>prop</shortcut>
			<description>Code snippet for an automatically implemented property</description>
			<author>Microsoft Corporation</author>
			<snippetTypes>
				<snippetType>Expansion</snippetType>
			</snippetTypes>
		</header>
		<snippet>
			<declarations>
				<literal>
					<id>type</id>
					<toolTip>Property type</toolTip>
					<default>int</default>
				</literal>
				<literal>
					<id>property</id>
					<toolTip>Property name</toolTip>
					<default>MyProperty</default>
				</literal>
			</declarations>
			<code Language="csharp"><!&#91;CDATA&#91;public $type$ $property$
		{
    			get { return _$property$; }
    			set { _$property$ = value; }
		}
$end$&#93;&#93;>
			</code>
		</snippet>
	</codeSnippet>
</codeSnippets>

The key section that fixes this is:

			<code Language="csharp"><!&#91;CDATA&#91;public $type$ $property$
		{
    			get { return _$property$; }
    			set { _$property$ = value; }
		}
$end$&#93;&#93;>

Or if you use “m” instead of “_” as I do, of course you would replace the “_” with an “m”.

			<code Language="csharp"><!&#91;CDATA&#91;public $type$ $property$
		{
    			get { return m$property$; }
    			set { m$property$ = value; }
		}
$end$&#93;&#93;>

Now when you create a member variable and then a property that matches it exactly except for the prefix character, the works is done for you, making you a more efficient programmer.

You may want to change the propg snippet as well.


Copyright ® Rhyous.com – Linking to this page is allowed without permission and as many as ten lines of this page can be used along with this link. Any other use of this page is allowed only by permission of Rhyous.com.

How to query a SQL database in C#?

How to query a SQL database in C#? or How to execute a database query against a database in C#?

Having used other languages where this is much simpler, I was surprised at how “not simple” this was in C#. I expected it to be a little more complex than in some scripting language such as PHP, but it was way more complex.

It is nice to run the Query and store the results in a DataTable, so that is what my example shows.

There are a few simple steps to remember.

  1. Create a String to hold the database connection string.
    (Note: If you don’t know the proper format for a connection string use SqlConnectionBuilder.)
  2. Create a SQL connection object.
  3. Open the SQL connection.
  4. Create a String to hold the query.
  5. Create a SqlCommand object and pass the constructor the connection string and the query string.
  6. Use the above SqlCommand object to create a SqlDataReader object.
  7. Create a DataTable object to hold all the data returned by the query.
  8. Use the DataTable.Load(SqlDataReader) function to put the results of the query into a DataTable.
  9. Do something with the data in your DataTable here. For example, it is common to use a foreach loop to do something with each row.
  10. Close the SQL connection.

Here is how I do it:

using System;
using System.Collections.Generic;
using System.Linq;
using System.Text;
using System.Data;
using System.Data.SqlClient;

namespace CountRows
{
    class Program
    {
        static void Main(string[] args)
        {
            // Create a String to hold the database connection string.
            // NOTE: Put in a real database connection string here or runtime won't work
            string sdwConnectionString = @"Data Source = ServerName; user id=UserName; password=P@sswd!; Initial Catalog = DatabaseName;";

            // Create a connection
            SqlConnection sdwDBConnection = new SqlConnection(sdwConnectionString);

            // Open the connection
            sdwDBConnection.Open();

            // Create a String to hold the query.
            string query = "SELECT * FROM MyTable";

            // Create a SqlCommand object and pass the constructor the connection string and the query string.
            SqlCommand queryCommand = new SqlCommand(query, sdwDBConnection);

            // Use the above SqlCommand object to create a SqlDataReader object.
            SqlDataReader queryCommandReader = queryCommand.ExecuteReader();

            // Create a DataTable object to hold all the data returned by the query.
            DataTable dataTable = new DataTable();

            // Use the DataTable.Load(SqlDataReader) function to put the results of the query into a DataTable.
            dataTable.Load(queryCommandReader);

            // Example 1 - Print your  Column Headers
            String columns = string.Empty;
            foreach (DataColumn column in dataTable.Columns)
            {
                columns += column.ColumnName + " | ";
            }
            Console.WriteLine(columns);

            // Example 2 - Print the first 10 row of data
            int topRows = 10;
            for (int i = 0; i < topRows; i++)
            {
                String rowText = string.Empty;
                foreach (DataColumn column in dataTable.Columns)
                {
                    rowText += dataTable.Rows[i][column.ColumnName] + " | ";
                }
                Console.WriteLine(rowText);
            }

            // Close the connection
            sdwDBConnection.Close();
        }
    }
}

So now the results are stored in a DataTable.

You can now access each row of data using the DataTable.Rows collection.

How to get the parent process that launched a C# application?

Hey all,

I have a process that is a C# process.  I need to do something different if someone just double-clicks the application than if it is launched by a certain other process.  So I decided to check the parent process.

I couldn’t find a simple C# only method. But I did find a code snippet that works. There were actually lots of posts on that provided the following code snippet or variations thereof, so I consider it to be public domain.  So obviously I didn’t write this part.

        private static Process GetParentProcess()
        {
            int iParentPid = 0;
            int iCurrentPid = Process.GetCurrentProcess().Id;

            IntPtr oHnd = CreateToolhelp32Snapshot(TH32CS_SNAPPROCESS, 0);

            if (oHnd == IntPtr.Zero)
                return null;

            PROCESSENTRY32 oProcInfo = new PROCESSENTRY32();

            oProcInfo.dwSize =
            (uint)System.Runtime.InteropServices.Marshal.SizeOf(typeof(PROCESSENTRY32));

            if (Process32First(oHnd, ref oProcInfo) == false)
                return null;

            do
            {
                if (iCurrentPid == oProcInfo.th32ProcessID)
                    iParentPid = (int)oProcInfo.th32ParentProcessID;
            }
            while (iParentPid == 0 && Process32Next(oHnd, ref oProcInfo));

            if (iParentPid > 0)
                return Process.GetProcessById(iParentPid);
            else
                return null;
        }

        static uint TH32CS_SNAPPROCESS = 2;

        [StructLayout(LayoutKind.Sequential)]
        public struct PROCESSENTRY32
        {
            public uint dwSize;
            public uint cntUsage;
            public uint th32ProcessID;
            public IntPtr th32DefaultHeapID;
            public uint th32ModuleID;
            public uint cntThreads;
            public uint th32ParentProcessID;
            public int pcPriClassBase;
            public uint dwFlags;
            [MarshalAs(UnmanagedType.ByValTStr, SizeConst = 260)]
            public string szExeFile;
        };

        [DllImport("kernel32.dll", SetLastError = true)]
        static extern IntPtr CreateToolhelp32Snapshot(uint dwFlags, uint th32ProcessID);

        [DllImport("kernel32.dll")]
        static extern bool Process32First(IntPtr hSnapshot, ref PROCESSENTRY32 lppe);

        [DllImport("kernel32.dll")]
        static extern bool Process32Next(IntPtr hSnapshot, ref PROCESSENTRY32 lppe);
    }

I took this code snippet and improved upon it and made myself the following static class. This class more easily exposes:

  • Parent Process Id
  • Parent Process name
  • Parent process executable name
  • Full path to parent process executable
  • Directory name where the parent process executable resides
using System;
using System.Collections.Generic;
using System.Diagnostics;
using System.Text;
using System.Runtime.InteropServices;

namespace ParentProcess
{
    public class ParentProcess
    {
        public static String ProcessName
        {
            get { return GetParentProcess().ProcessName; }
        }

        public static int ProcessId
        {
            get { return GetParentProcess().Id; }
        }

        public static String FullPath
        {
            get
            {
                return GetParentProcess().MainModule.FileName;
            }
        }

        public static String FileName
        {
            get
            {
                return System.IO.Path.GetFileName(GetParentProcess().MainModule.FileName);
            }
        }

        public static String DirectoryName
        {
            get
            {
                return System.IO.Path.GetDirectoryName(GetParentProcess().MainModule.FileName);
            }
        }

        private static Process GetParentProcess()
        {
            int iParentPid = 0;
            int iCurrentPid = Process.GetCurrentProcess().Id;

            IntPtr oHnd = CreateToolhelp32Snapshot(TH32CS_SNAPPROCESS, 0);

            if (oHnd == IntPtr.Zero)
                return null;

            PROCESSENTRY32 oProcInfo = new PROCESSENTRY32();

            oProcInfo.dwSize =
            (uint)System.Runtime.InteropServices.Marshal.SizeOf(typeof(PROCESSENTRY32));

            if (Process32First(oHnd, ref oProcInfo) == false)
                return null;

            do
            {
                if (iCurrentPid == oProcInfo.th32ProcessID)
                    iParentPid = (int)oProcInfo.th32ParentProcessID;
            }
            while (iParentPid == 0 && Process32Next(oHnd, ref oProcInfo));

            if (iParentPid > 0)
                return Process.GetProcessById(iParentPid);
            else
                return null;
        }

        static uint TH32CS_SNAPPROCESS = 2;

        [StructLayout(LayoutKind.Sequential)]
        public struct PROCESSENTRY32
        {
            public uint dwSize;
            public uint cntUsage;
            public uint th32ProcessID;
            public IntPtr th32DefaultHeapID;
            public uint th32ModuleID;
            public uint cntThreads;
            public uint th32ParentProcessID;
            public int pcPriClassBase;
            public uint dwFlags;
            [MarshalAs(UnmanagedType.ByValTStr, SizeConst = 260)]
            public string szExeFile;
        };

        [DllImport("kernel32.dll", SetLastError = true)]
        static extern IntPtr CreateToolhelp32Snapshot(uint dwFlags, uint th32ProcessID);

        [DllImport("kernel32.dll")]
        static extern bool Process32First(IntPtr hSnapshot, ref PROCESSENTRY32 lppe);

        [DllImport("kernel32.dll")]
        static extern bool Process32Next(IntPtr hSnapshot, ref PROCESSENTRY32 lppe);
    }
}

This makes it easier for me to simply include the class above in my code and make simple calls:

String exename = ParentProcess.FileName;
String FullPathToExe = ParentProcess.FullPath;
String DirectoryInWhichExeResides= ParentProcess.DirectoryName;

…and the pid and process name, etc…

I hope this helps you.

References
http://www.facebook.com/note.php?note_id=73447531256
http://www.debugging.com/bug/6657
http://www.eggheadcafe.com/software/aspnet/35541264/how-to-get-the-parent-pro.aspx


No Copyright.

Generic XML Serializer Class for C# and an XML Serialization usage example

Hey all,

Today I was working on XML Serialization.

After learning how to do it, I discovered it takes four lines of code to write an XML and four lines of code to read in an XML.

However, I prefer one line of code to four so I made a Serializer.cs class with two static functions.

After thinking about it, I made these classes generic so they work with any type. I hope this helps someone.

using System;
using System.IO;
using System.Xml.Serialization;

namespace BlogTool
{
    public class Serializer
    {
        #region Functions
        public static void SerializeToXML<t>(T t, String inFilename)
        {
            XmlSerializer serializer = new XmlSerializer(t.GetType());
            TextWriter textWriter = new StreamWriter(inFilename);
            serializer.Serialize(textWriter, t);
            textWriter.Close();
        }

        public static T DeserializeFromXML<t>(String inFilename)
        {
            XmlSerializer deserializer = new XmlSerializer(typeof(T));
            TextReader textReader = new StreamReader(inFilename);
            T retVal = (T)deserializer.Deserialize(textReader);
            textReader.Close();
            return retVal;
        }
        #endregion
    }
}

So now if you have a class you can more easily serialize it to and from an XML.

Here is an example Project that contains these files:

  • Blog.cs
  • BlogList.cs
  • Program.cs
  • Serializer.cs

Blog.cs

using System;

namespace BlogTool
{
    [Serializable()]
    public class Blog
    {
        #region Member Variables
        String mBlogUrl;
        String mCategory;
        #endregion

        #region Constructors
        public Blog()
        {
        }

        public Blog(String inURL, String inCategory)
        {
            mBlogUrl = inURL;
            mCategory = inCategory;
        }
        #endregion

        #region Properties
        public String BlogUrl
        {
            get { return mBlogUrl; }
            set { mBlogUrl= value; }
        }

        public String Category
        {
            get { return mCategory; }
            set { mCategory= value; }
        }
        #endregion
    }
}

BlogList.cs

using System.Collections.Generic;

namespace BlogTool
{
    [Serializable]
    public class BlogList
    {
        #region Member Variables
        List<blog> mBlogs = new List<blog>();
        #endregion

        #region Constructors

        /*
		 * The default constructor
 		 */
        public BlogList()
        {
        }

        #endregion

        #region Properties
        public List<blog> Blogs
        {
            get { return mBlogs; }
            set { mBlogs = value; }
        }
        #endregion
    }
}

Program.cs

namespace BlogTool
{
    class Program
    {
        static void Main(string[] args)
        {
            BlogList bloglist = new BlogList();
            Blog b1 = new Blog("http://rhyous.com","Software");
            Blog b2 = new Blog("http://www.alittletipsy.com", "Crafts");
            bloglist.Blogs.Add(b1);
            bloglist.Blogs.Add(b2);
            Serializer.SerializeToXML(bloglist, "FavoriteBlogs.xml");
        }
    }
}

Serializer.cs

using System;
using System.IO;
using System.Xml.Serialization;

namespace BlogTool
{
    public class Serializer
    {
        #region Functions
        public static void SerializeToXML<t>(T t, String inFilename)
        {
            XmlSerializer serializer = new XmlSerializer(t.GetType());
            TextWriter textWriter = new StreamWriter(inFilename);
            serializer.Serialize(textWriter, t);
            textWriter.Close();
        }

        public static T DeserializeFromXML<t>(String inFilename)
        {
            XmlSerializer deserializer = new XmlSerializer(typeof(T));
            TextReader textReader = new StreamReader(inFilename);
            T retVal = (T)deserializer.Deserialize(textReader);
            textReader.Close();
            return retVal;
        }
        #endregion
    }
}

Ok, so now that you have the files, you can run this program.

In the bin\debug or bin\release directory where you executable is placed when you build, you will see the FavoriteBlogs.xml file. The XML should look as follows:

<?xml version="1.0" encoding="utf-8"?>
<blogList xmlns:xsi="http://www.w3.org/2001/XMLSchema-instance" xmlns:xsd="http://www.w3.org/2001/XMLSchema">
  <blogs>
    <blog>
      <blogUrl>http://rhyous.com</blogUrl>
      <category>Software</category>
    </blog>
    <blog>
      <blogUrl>http://www.alittletipsy.com</blogUrl>
      <category>Crafts</category>
    </blog>
  </blogs>
</blogList>

I know, this is not written very well as a walk-thru, but I wrote it fast. Maybe I will clean it up later.

Sources:
http://msdn.microsoft.com/en-us/library/system.xml.serialization.xmlserializer.aspx
http://www.switchonthecode.com/tutorials/csharp-tutorial-xml-serialization

How to get your project's version dynamically in C#?

Ok, so I wanted to create a little Help | About page that looks like this.

MyProgram 1.0.0.5

Author: Jared Barneck

Contributors: John, Mike, Mark, Tom, Bill, Jane, Ryan, Josh

I don’t really want to have to remember to change the version in the help file with each release, so I wanted to get the version dynamically.

Turns out that you can get the version as a string with a single line of code:

String theVersion = System.Reflection.Assembly.GetExecutingAssembly().GetName().Version.ToString();

Once you have the version as a string, you can display it how you want.

Tutorial – Creating a StaticResource and Binding to it

The XAML allows you to provide what are called StaticResources. Such resources can be given to a Window or to certain controls.

For this tutorial, I assume you are in Visual Studio 2008. I assume that you already know how to create a new Project and choose WPF Application. All examples assume you have a new WPF Application.

So lets get started with three examples of binding to StaticResources.

Example 1 – Making a String a StaticResource and Binding to it

This example will demonstrate instantiating a String as a StaticResource and binding a TextBox to it.

Step 1 – Add the elements

  1. Add three TextBox elements into the default Grid control.
            <listBox Margin="12,12,0,0" Name="listBox1" Height="100" HorizontalAlignment="Left" VerticalAlignment="Top" Width="120" />
            <listBox Margin="138,12,20,0" Name="listBox2" Height="100" VerticalAlignment="Top" />
            <textBox Margin="12,118,0,121" Name="textBox1" Width="120" IsReadOnly="True" HorizontalAlignment="Left" />
            <textBox Margin="138,118,20,121" Name="textBox2" Width="120" IsReadOnly="True" HorizontalAlignment="Left" />


Step 2 – Add the static resources

  1. Add an xmlns reference to the System namespace. This is done by adding the xmlns:System line to as an attribute to the top Window element as shown:
    <window x:Class="StaticResourceBinding.Window1"
        xmlns="http://schemas.microsoft.com/winfx/2006/xaml/presentation"
        xmlns:x="http://schemas.microsoft.com/winfx/2006/xaml"
        xmlns:System="clr-namespace:System;assembly=mscorlib"
        Title="Window1" Height="300" Width="300">
    
  2. Create a Windows.Resources section in the XAML and add three Strings to it as StaticResources.
        <window.Resources>
            <system:String x:Key="FirstName">Jared</system:String>
            <system:String x:Key="LastName">Barneck</system:String>
            <system:String x:Key="Alias">Rhyous</system:String>
        </window.Resources>
    

Step 3 – Adding Binding to each TextBox element’s Text property

  1. Configure the three TextBox elements to bind to each String added as a StaticResource by adding a Text attribute.
            <textBox Text="{StaticResource FirstName}" Height="23" Margin="51,25,107,0" Name="textBox1" VerticalAlignment="Top" />
            <textBox Text="{StaticResource LastName}" Height="23" Margin="51,54,107,0" Name="textBox2" VerticalAlignment="Top" />
            <textBox Text="{StaticResource Alias}" Height="23" Margin="51,83,107,0" Name="textBox3" VerticalAlignment="Top" />
    

The final XAML looks as follows. No changes were made to the code behind at all.

<window x:Class="StaticResourceBinding.Window1"
    xmlns="http://schemas.microsoft.com/winfx/2006/xaml/presentation"
    xmlns:x="http://schemas.microsoft.com/winfx/2006/xaml"
    xmlns:System="clr-namespace:System;assembly=mscorlib"
    Title="Window1" Height="300" Width="300">
    <window.Resources>
        <system:String x:Key="FirstName">Jared</system:String>
        <system:String x:Key="LastName">Barneck</system:String>
        <system:String x:Key="Alias">Rhyous</system:String>
    </window.Resources>
    <grid>
        <textBox Height="23" Margin="51,25,107,0" Name="textBox1" VerticalAlignment="Top" Text="{StaticResource FirstName}"/>
        <textBox Height="23" Margin="51,54,107,0" Name="textBox2" VerticalAlignment="Top" Text="{StaticResource LastName}"/>
        <textBox Height="23" Margin="51,83,107,0" Name="textBox3" VerticalAlignment="Top" Text="{StaticResource Alias}"/>
    </grid>
</window>

Example 2 – Declaring an array as a StaticResource and Binding a ListBox to it

This example will demonstrate instantiating arrays as StaticResources and binding a ListBox to the arrays.

To show an example of building onto existing or previous learned knowledge, we are going to also implement binding each TextBox's Text properties to the ListBox's SelectedItem property.

Step 1 – Add the elements

  1. Add two ListBox and two TextBox elements into the default Grid control.
            <listBox Margin="12,12,0,0" Name="listBox1" Height="100" HorizontalAlignment="Left" VerticalAlignment="Top" Width="120" />
            <listBox Margin="138,12,20,0" Name="listBox2" Height="100" VerticalAlignment="Top" />
            <textBox Margin="12,118,0,121" Name="textBox1" Width="120" IsReadOnly="True" HorizontalAlignment="Left" />
            <textBox Margin="138,118,20,121" Name="textBox2" Width="120" IsReadOnly="True" HorizontalAlignment="Left" />
    

Step 2 – Add the static resources

  1. Add an xmlns reference to the System namespace. This is done by adding the xmlns:System line to as an attribute to the top Window element as shown:
    <window x:Class="StaticResourceBinding.Window1"
        xmlns="http://schemas.microsoft.com/winfx/2006/xaml/presentation"
        xmlns:x="http://schemas.microsoft.com/winfx/2006/xaml"
        xmlns:System="clr-namespace:System;assembly=mscorlib"
        Title="Window1" Height="300" Width="300">
    
  2. Create a Windows.Resources section in the XAML and add two arrays as StaticResources: one an array of strings, and one an array of integers.
        <window.Resources>
            <x:Array x:Key="StringList" Type="System:String">
                <system:String>Line 1</system:String>
                <system:String>Line 2</system:String>
                <system:String>Line 3</system:String>
                <system:String>Line 4</system:String>
            </x:Array>
            <x:Array x:Key="IntArray" Type="System:Int32">
                <system:Int32>100</system:Int32>
                <system:Int32>200</system:Int32>
                <system:Int32>300</system:Int32>
                <system:Int32>400</system:Int32>
            </x:Array>
        </window.Resources>
    

Step 3 – Adding Binding

  1. Configure one ListBox's Text property to bind to the String array and the other ListBox's Text property to bind to the Int32 array.
            <listBox ItemsSource="{StaticResource StringList}" Margin="12,12,0,0" Name="listBox1" Height="100" HorizontalAlignment="Left" VerticalAlignment="Top" Width="120" />
            <listBox ItemsSource="{StaticResource IntArray}" Margin="138,12,20,0" Name="listBox2" Height="100" VerticalAlignment="Top" />
    
  2. We will also add binding to show you how you can combine binding to StaticResources and binding to another element’s property.Bind one TextBox to the listBox1.SelectedItem property and bind the other to the listBox2.SelectedItem.
            <textBox Text="{Binding ElementName=listBox1, Path=SelectedItem}" Margin="12,118,0,121" Name="textBox1" Width="120" IsReadOnly="True" HorizontalAlignment="Left" />
            <textBox Text="{Binding ElementName=listBox2, Path=SelectedItem}" Margin="138,118,20,121" Name="textBox2" Width="120" IsReadOnly="True" HorizontalAlignment="Left" />
    
  3. Build your application and run it. Notice as you select an item in the list, it displays.

The final XAML looks as follows. No changes were made to the code behind at all.

<window x:Class="StaticResourceBinding2.Window1"
    xmlns="http://schemas.microsoft.com/winfx/2006/xaml/presentation"
    xmlns:x="http://schemas.microsoft.com/winfx/2006/xaml"
    xmlns:System="clr-namespace:System;assembly=mscorlib"
    Title="Window1" Height="300" Width="300">
    <window.Resources>
        <x:Array x:Key="StringList" Type="System:String">
            <system:String>Line 1</system:String>
            <system:String>Line 2</system:String>
            <system:String>Line 3</system:String>
            <system:String>Line 4</system:String>
        </x:Array>
        <x:Array x:Key="IntArray" Type="System:Int32">
            <system:Int32>100</system:Int32>
            <system:Int32>200</system:Int32>
            <system:Int32>300</system:Int32>
            <system:Int32>400</system:Int32>
        </x:Array>
    </window.Resources>
    <grid>
        <listBox ItemsSource="{StaticResource StringList}" Margin="12,12,0,0" Name="listBox1" Height="100" HorizontalAlignment="Left" VerticalAlignment="Top" Width="120" />
        <listBox ItemsSource="{StaticResource IntArray}" Margin="138,12,20,0" Name="listBox2" Height="100" VerticalAlignment="Top" />
        <textBox Text="{Binding ElementName=listBox1, Path=SelectedItem}" Margin="12,118,0,121" Name="textBox1" Width="120" IsReadOnly="True" HorizontalAlignment="Left" />
        <textBox Text="{Binding ElementName=listBox2, Path=SelectedItem}" Margin="138,118,20,121" Name="textBox2" Width="120" IsReadOnly="True" HorizontalAlignment="Left" />
    </grid>
</window>

Example 3 – Adding Resources to a Control

In the previous two examples, we added the resources to the main Window object. However, a resource can be added to a control.

This example will demonstrate instantiating an array as a StaticResources for a control. We will then bind a TabControl’s ItemSource property to this array. This will cause a Tab to be created for each item in the array.

Step 1 – Add the elements

  1. Add a TabControl into the default Grid control.
            <tabControl Name="tabControl1">
    

Step 2 – Add the static resources

  1. Add an xmlns reference to the System namespace. This is done by adding the xmlns:System line to as an attribute to the top Window element as shown:
    <window x:Class="StaticResourceBinding.Window1"
        xmlns="http://schemas.microsoft.com/winfx/2006/xaml/presentation"
        xmlns:x="http://schemas.microsoft.com/winfx/2006/xaml"
        xmlns:System="clr-namespace:System;assembly=mscorlib"
        Title="Window1" Height="300" Width="300">
    
  2. Create a Grid.Resources section in the XAML and add an array as a StaticResource under the Grid control.
            <grid.Resources>
                <x:Array x:Key="TabList" Type="System:String">
                    <system:String>Tab 1</system:String>
                    <system:String>Tab 2</system:String>
                    <system:String>Tab 3</system:String>
                </x:Array>
            </grid.Resources>
    

Step 3 – Adding Binding to the TabControl’s ItemSource Property

  1. Bind the TabControl's ItemSource property to bind to the String array.
            <tabControl Name="tabControl1" ItemsSource="{StaticResource TabList}">
    

The final XAML looks as follows. No changes were made to the code behind at all.

<window x:Class="StaticResourceBinding3.Window1"
    xmlns="http://schemas.microsoft.com/winfx/2006/xaml/presentation"
    xmlns:x="http://schemas.microsoft.com/winfx/2006/xaml"
    xmlns:System="clr-namespace:System;assembly=mscorlib"
    Title="Window1" Height="300" Width="300">
    <grid>
        <grid.Resources>
            <x:Array x:Key="TabList" Type="System:String">
                <system:String>Tab 1</system:String>
                <system:String>Tab 2</system:String>
                <system:String>Tab 3</system:String>
            </x:Array>
        </grid.Resources>
        <tabControl Name="tabControl1" ItemsSource="{StaticResource TabList}">
        </tabControl>
    </grid>
</window>

Hey, there is nothing wrong with more examples, so if you have an example of your own feel free to add it as a comment.


Copyright ® Rhyous.com – Linking to this post is allowed without permission and as many as ten lines of this page can be used along with this link. Any other use of this page is allowed only by permission of Rhyous.com.

How to upload a file to an FTP server using C#?

C# (Mono) on FreeBSD

Ok, so today I needed to FTP a file.  It took me some time and research but I have a function that will upload a file to an FTP server.

I found a lot of examples that were very complex, and rightfully so as they have a lot of error and exception handling. However, this complexity makes it difficult to learn.

So this is a non-complex version. It follows some basic steps:

  1. Get the local file name: C:\Users\Rhyous\Desktop\File1.zip
  2. Open a request using the full destination ftp path: Ftp://Ftp.Server.tld/Path/File1.zip
  3. Configure the connection request
  4. Create a stream from the file
  5. Read the file into the a local stream
  6. Close the local stream
  7. Create a stream to the FTP server
  8. Write the local stream to the FTP stream
  9. Close the stream to the FTP server

using System;
using System.IO;
using System.Net;

namespace ConsoleApplication1
{
class Program
{
static void Main(string[] args)
{
string ftplocation = “ftp://ftp.server.tld/path”;
string file = @”C:\Users\Rhyous\Desktop\File1.zip” // Or on FreeBSD: “/usr/home/jared/test2.txt”;
string user = “Anonymous”;
string password = “AnyPasswd!”;
UploadToFTP(ftplocation, file, user, password);
}

static void UploadToFTP(String inFTPServerAndPath, String inFullPathToLocalFile, String inUsername, String inPassword)
{
// Get the local file name: C:\Users\Rhyous\Desktop\File1.zip
// and get just the filename: File1.zip. This is so we can add it
// to the full URI.
String filename = Path.GetFileName(inFullPathToLocalFile);

// Open a request using the full URI, c/file.ext
FtpWebRequest request = (FtpWebRequest)FtpWebRequest.Create(inFTPServerAndPath + “/” + filename);

// Configure the connection request
request.Method = WebRequestMethods.Ftp.UploadFile;
request.Credentials = new NetworkCredential(inUsername, inPassword);
request.UsePassive = true;
request.UseBinary = true;
request.KeepAlive = false;

// Create a stream from the file
FileStream stream = File.OpenRead(inFullPathToLocalFile);
byte[] buffer = new byte[stream.Length];

// Read the file into the a local stream
stream.Read(buffer, 0, buffer.Length);

// Close the local stream
stream.Close();

// Create a stream to the FTP server
Stream reqStream = request.GetRequestStream();

// Write the local stream to the FTP stream
// 2 bytes at a time
int offset = 0;
int chunk = (buffer.Length > 2048) ? 2048 : buffer.Length;
while (offset < buffer.Length) { reqStream.Write(buffer, offset, chunk); offset += chunk; chunk = (buffer.Length - offset < chunk) ? (buffer.Length - offset) : chunk; } // Close the stream to the FTP server reqStream.Close(); } } } [/sourcecode] This works well for most files. One problem is that this code reads the entire local file into memory, which might not be a good idea for a file that is very large (multiple gigabytes). It would be better to read the local file in bits. I upload in bits so this would not be hard to read a little bit, upload it, read a little bit more, upload it, etc... Resources: http://msdn.microsoft.com/en-us/library/system.net.ftpwebrequest.aspx http://msdn.microsoft.com/en-us/library/system.io.stream.aspx http://www.vcskicks.com/csharp_ftp_upload.php

A WPF Progress Bar

Today I needed a progress bar for as I was creating a c# tool that FTPs a file.  I wanted to show progress as the FTP file was uploaded.

I found a good solution at Mikes Code Blog. He has a post and a follow-up post.

WPF Progress Bar code

WPF Progress Bar Revisited

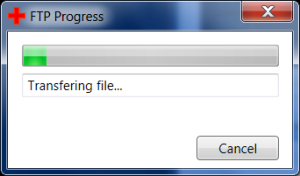
I created the progress bar as described and it worked really well. Here is a screen shot:

Thanks Mike!